Power Menu
Power Menu
Would like to share the quickest (in my opinion) way to create Power Menu for Power Apps.
Short description of challenge
When I first started Power Apps tried to create Menu at Home page or on the other Screens but using the grouping of the controls like label, icon, rectangle or buttons. That way took me ages to setup and anytime wanted to make updates or change it consumed more time. When I did more digging it was also not good for performance…
- Don’t add more than 500 controls to the same app
https://docs.microsoft.com/en-us/powerapps/maker/canvas-apps/performance-tips - Performance considerations with PowerApps
https://powerapps.microsoft.com/en-us/blog/performance-considerations-with-powerapps/
Minimizing the number of dom elements can help boost your performance.
Keeping in mind above simple Menu can contain 3 controls for each item in Menu and let’s say we have 5 items in Menu and we are applying it to all 5 screens. 3x5x5 = 75 controls!
Another example 8 items in Menu and 8 screens = 192!
That means we are left with 308 controls to create our functionalities…
Solution
After finishing the reading of above articles already had the answer:
Collections are very powerful in the Power Apps the same goes for galleries.
Build
Will show the way how to do it with label and icon in gallery working with collection. Yet, you could survive with even single label in gallery.
Collection setup
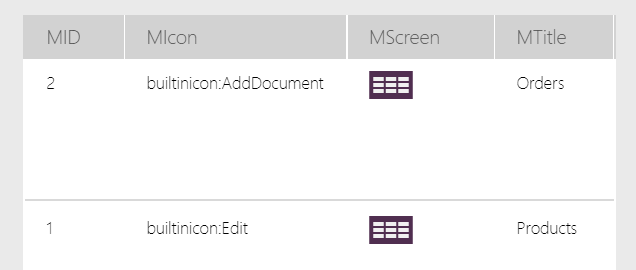
First version of the collection will contain only couple properties:
- MTitle – Menu item name – displayed in label
- MIcon – property of Icon
- MID – used to reorder items
- MScreen – where User will navigate after clicking Menu item
ClearCollect(
     colMenu,
     {
         MTitle: "Orders",
         MID: 2,
         MIcon: Icon.AddDocument,
         MScreen:Orders
     },
     {
         MTitle: "Products",
         MID: 1,
         MIcon: Icon.Edit,
         MScreen:Products
     },
     {
         MTitle: "Categories",
         MID: 3,
         MIcon: Icon.Newspaper,
         MScreen:Categories
     }
 );
HINT:
You can add as many properties as you want. But remember to add comments for your future self.
Add collection to OnStart property of the application.
Gallery setup
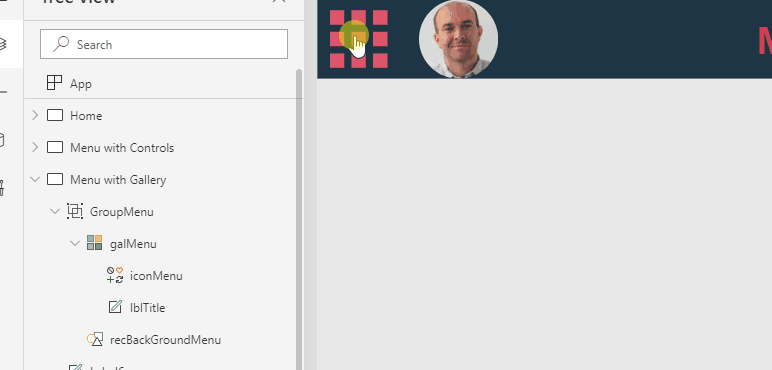
Run the OnStart property and check if Collections is created. Use View link from top level of the Power Apps editor and click Collections, you should see:
Return to the Editor and from Insert menu select Gallery my selection is Blank vertical.
First select as Data Source (Items property) our collection – colMenu.
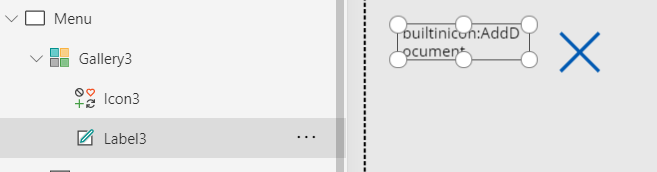
Next select Template of empty Gallery – first item in the gallery and insert label and icon controls:
Change:
- the label control Text to ThisItem.MTitle
- the icon control Icon property to ThisItem.MIcon
- the gallery control OnSelect property: Navigate(ThisItem.MScreen,<<You preferred transition>>)
That’s it Power Menu. The solution does not look good at this moment so you can as additional steps do following changes:
- the gallery control Items property to: Sort(colMenu,MID,Ascending)
It will change the order of the Menu Items – you can now control your display thanks to adding MID property - the gallery control TemplatePadding property: 20
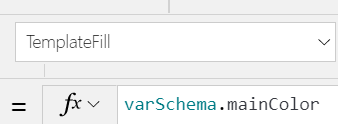
It will add the extra spacing between every gallery item - the gallery control TemplateFill property: <<add your color>>
It will add the background to the gallery items – thanks to that you don’t need add rectangle control
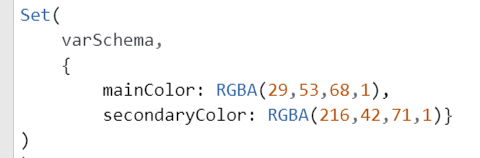
HINT:
Use global variable or collection to keep your layout in check:
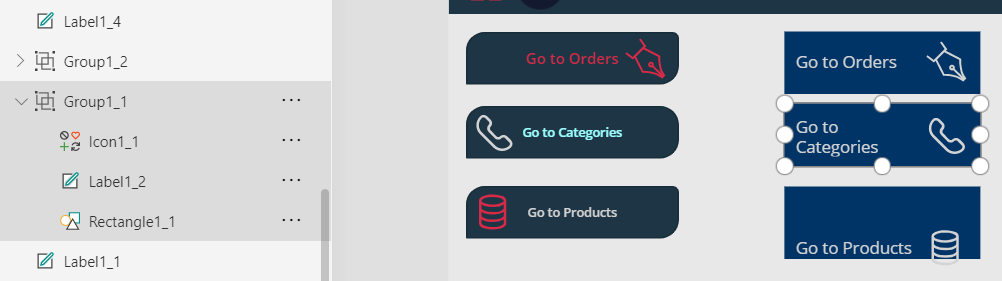
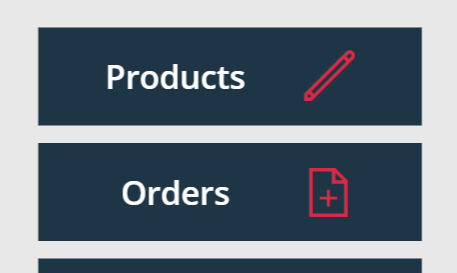
After changing the Icon and Label color the end result should be similar to:
Bonus: Show/Hide menu
Not in every screen you need to display Menu so there is simple trick to Show / Hide the menu:
- Add to your app additional Icon control, for me it will be Waffle
- OnSelect of this control add:

- Update Visible property of your Gallery to variable varShowMenu
With that every time when User will click the Waffle it will show or hide Menu.
Currently when User will see the Menu all other controls are still active and User can click them… To increase User Experience you can add semitransparent rectangle and group it with your Gallery.
NOTE:
Remember to keep the Visible property to varShowMenu of Gallery and Rectangle group.
Rectangle should be one level below Gallery to not disable Menu buttons!
End result:
Summary
As promised setup of Power Menu was quick and easy. Going back to my main thought instead of using 192 controls we can go with 32 (4 controls x 8 screens). For me it is huge improvement.
It also give us one place to do all updates of the Menu content which is propagated across all Galleries.
I’m aware that with Components you can save even more controls but as it is still not in the prod some clients won’t take the risk…
Hope you liked this article. And it will help you to build awesome Power Apps.
Thank you for reading.
Ps. Power Menu v2 is coming soon:)
Ps2. If you are interested in other ways to create solutions with collections and galleries check my other article about Dynamic breadcrumbs in Power Apps.