How to overcome the Power Automate Approvals 30 days limit

How to overcome the Power Automate Approvals 30 days limit
How to overcome the Power Automate Approvals 30 days limit post is my attempt to show how to deal with this Flow annoying 30 days limit.
- General idea of approach
- First Flow – create new Audit item
- Loophole corrections
- Second Flow – track Approval
- Approvals reminders consideration
- Flow result consideration
- Summary
Update 4th of January 2022 – reworked whole post to make it easier to understand & follow (at least I hope 😁)
General idea of approach
Firstly I will allow myself to explain one bit:
- When Power Automate creates a new Approval, a new Approval ID is generated.
- When Approver is taking action then Approval ID is used by Power Automate to update necessary information in the back-end tables.
I will “grab” Approval ID and save it, with that I can wait for the Approver to act as long as I want. In other words I will have the ability to control what is happening between first and second step.
I can do it like that because Power Automate have dedicated actions to Create an Approval (triggers creation of Approval ID) and Wait for an approval (use Approval ID for updates).
There is also a third Approval action (most commonly used) which combine create and wait called: Start and wait for an approval but with it, I cannot go over 30 days limit…
In my solution I split the work and Create an Approval will be used in first flow then fresh and new Approval ID will be saved to Approval Audit list.
I’m using SharePoint list as back-end but all other data storage can be utilized.
Next from Approval Audit list will start second flow to Wait for an approval and apply remaining logic.
First Flow – create new Audit item
My first Flow for Long Approvals in Power Automate looks as follows:
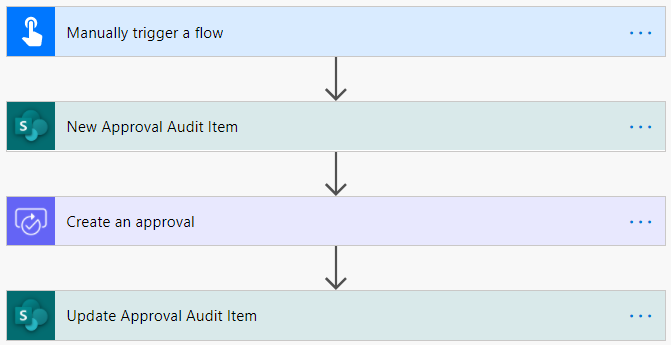
As this only demonstration I will use manual trigger but I’m sure your process will start from a different place.
I will trigger the process manually and provide Title of my Audit item. Then create a new Audit Approval item. As the second process will start on MODIFICATION of item (with trigger condition).
Next I’m using Create an approval action not Start and wait for an approval, just CREATE. With that, I know the process will move forward and not wait for the result of Approval action.
Next is update action of the Approval Audit item and I’m adding there ApprovalID so in the second flow I will be able to connect to the context of this Approval action.
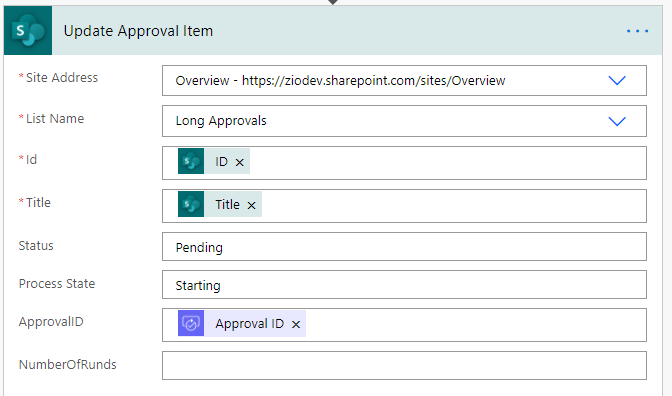
In the update, I’m also changing Process State to value: Starting and Status to Pending.
It was the initial part of mine configuration, but I learned that it is not enough…
Loophole corrections
This is a new section added on 18th December 2020.
I could also name this paragraph as finishing configuration of the First (inital) Flow 😁
While working with this approach, I notice that it is perfect if the decisions of Managers is ALWAYS taking long time. But If in your scenario there is chance that Manager will react to the Approval very fast (couple minutes) then there is risk that the Second Flow will FAIL:

That is occurring when Approver will react to Approval action quicker than Second Flow will start (literally a matter of minute, max couple). That is also why in the Second Flow I’m only waiting for Timeout status.
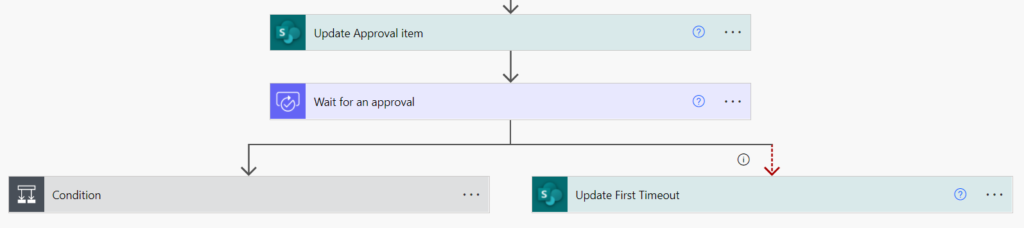
To mitigate this issue, I did the following updates in my First Flow:
- Added Wait for an approval (just after updating Audit item with Approval ID)
- Added two branches
- Left with Condition it will check Outcome of Approval
- Right to manage Timeout scenario
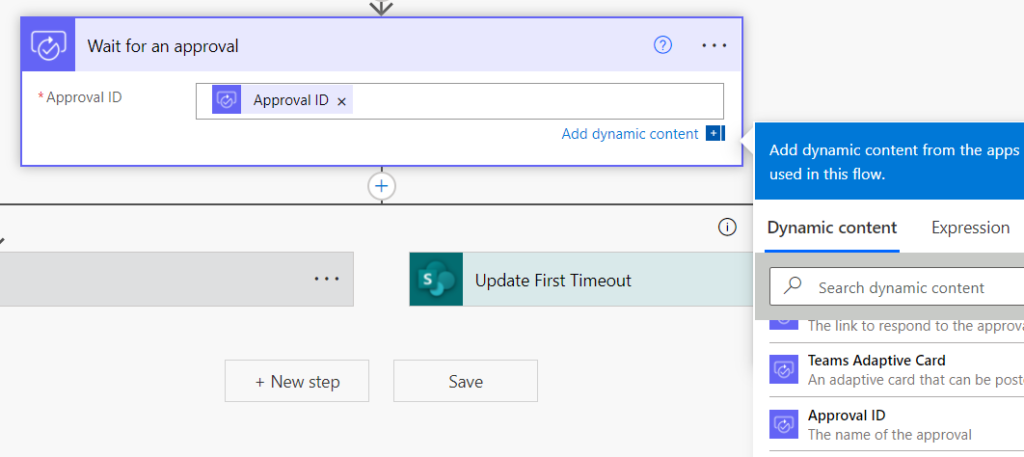
Wait for an approval configuration
While I split the Create and Wait Approval actions I’m getting access to Approval ID property of Create an approval action (already used in Audit item). I will use Approval ID again:
Timeout setting
Yet, the most important setting in Wait for an approval is the Timeout. Go to 3 dots, click Settings to find Timeout.
I’m setting it to 29 days and 23 hours (limit for flow is 30 days so prefer to leave an extra hour before expiry).

For testing, it is worth to use a value of 1 minute which is PT1M.
With this setting set like this I’m sure that one hour before expiry the Wait for an approval will timeout and I can configure what will happen utilizing run after options.
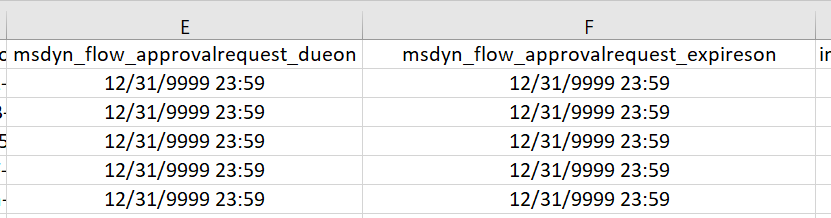
It is possible to configure the whole process like this, as the Approval action in the back-end have a very long expiry date:
With Wait for an approval ready, I can move to configuration of Timeout branch.
Timeout branch configuration
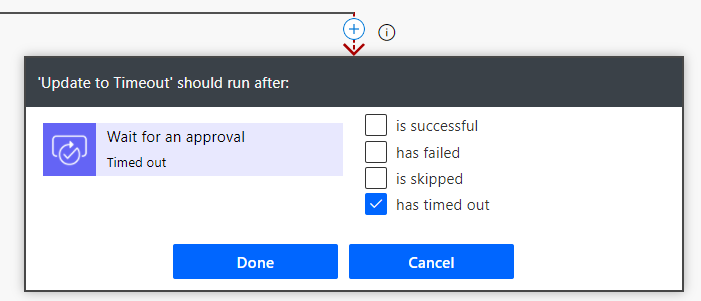
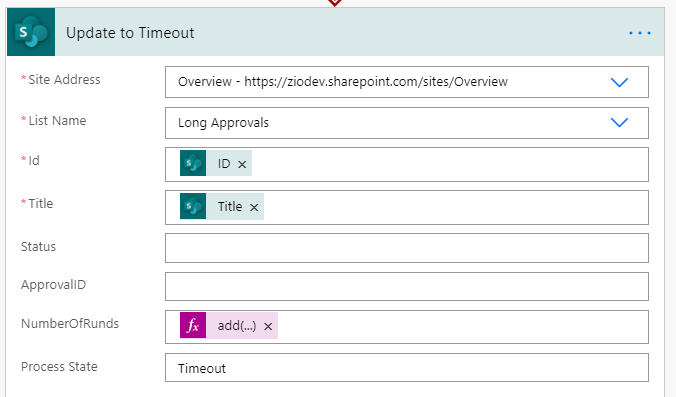
After adding Right branch and Update item action, first thing which I’m doing is configuration of run after setting. I’m selection Update First Timeout action and after opening Run After setting selecting only has timed out option.
In the action itself I’m changing Process State to “Timeout” value.
To summarize this part, I created First Flow which have Approval actions split (Create, Wait) and added Timeout branch to initialize Second Flow.
Second Flow – for timeouts
Trigger Conditions
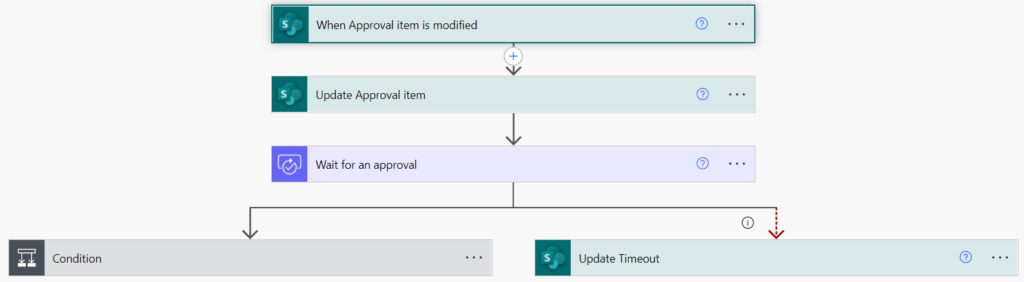
Second Flow in my configuration is starting with trigger When an item or a file is modified. To control when the Flow is running, I’m also configuring trigger conditions.
Thanks to trigger conditions I’m limiting the number of the Flow runs and avoiding unnecessary executions which potentially could break the process.
In my Trigger Conditions, I’m checking Process State and looking for: “Timeout” value.
Update 12.12.2020 thanks @TomaszPoszytek for spotting missing @
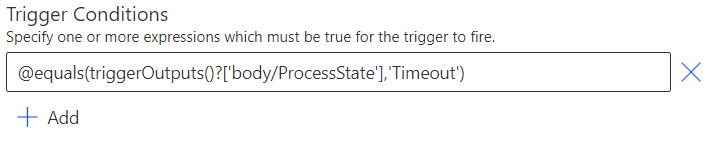
@equals(triggerOutputs()?['body/ProcessState'],'Timeout')Tip
If you are not sure how to create such formula you can use Compose action and in the Expression create your condition:
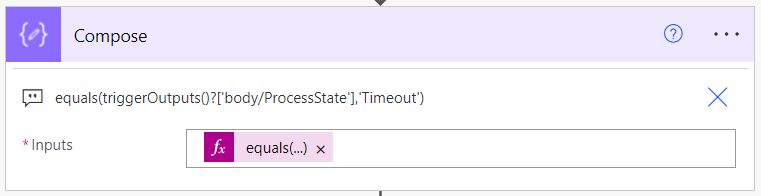
Finishing touch is adding @ character in the Trigger Conditions.
To access Trigger Conditions setting, click the 3 dots menu and select Settings and you should find it at the bottom of the list.
Rest of configuration
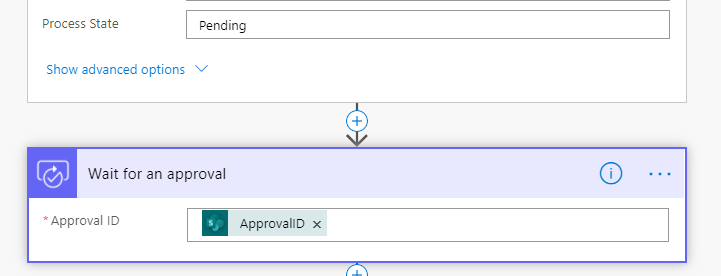
When I made trigger configured, I’m adding update of Process State column to Pending (via Update Item action, of course).
Next is adding Wait for an approval action and adding to it ApprovalID value (this time from Approval item).
After that again adding two branches:
- To handle Outcome of Approval
- To create timeout loop
As you may notice, the above configuration is almost the same as in the case of the First Flow. So please remember to configure:
Worth to note here is with the Timeout branch (right) I create a loop of the Second Flow. Second Flow will run every time when Wait for an approval time outed. Keeping that in mind I added property NumberOfRounds so after for instance 3rd iteration you could add a condition to stop the whole process.
As you can see How to overcome the Power Automate Approvals 30 days limit, the whole idea is around literally two actions Create an Approval, Wait for an approval and proper run after configuration. However, this is couple considerations which I would like also to cover.
Approvals reminders consideration
In the above solution I did not describe so far very important consideration: reminders.
Why this is important? I think very much!
Just imagine finding Approval request after +30 days in your mailbox…
Again, thanks to the fact that I used Create an approval action, I get access to neat property which is Respond link.
In the First Flow you can access it directly, but it should be also one of the properties of the Audit item, so it can be used in Second Flow. (Also don’t forget about the Approver / s email to know to whom the Reminder should be delivered.)

To send Reminder I can just add new action below Update Timeout action in Timeout branch:

Flow result consideration
If I leave the configuration as it is the process would work and the loop effect will be achieved. Yet, there is one bit more which bothers me:
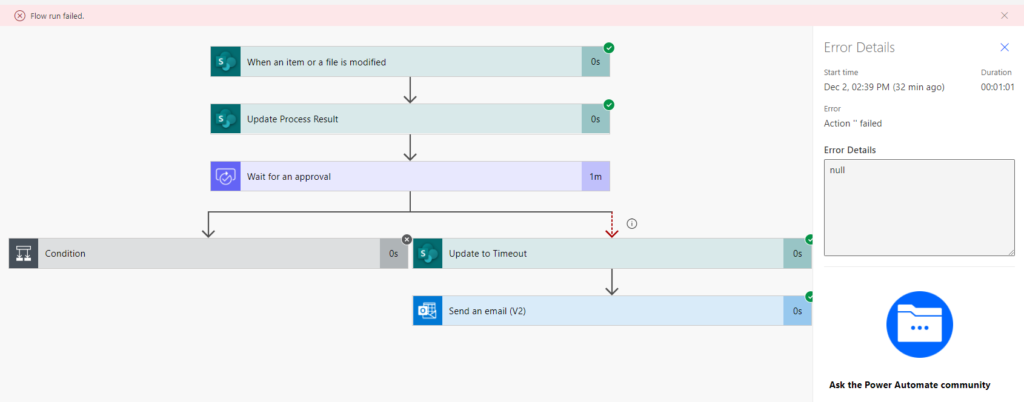
Thou my logic is correct Flow execution result will be marked as FAILED…
To manage this I’m connecting both branches with Terminate action and selecting in it Succeeded value. Very important is to configure run after settings correctly:
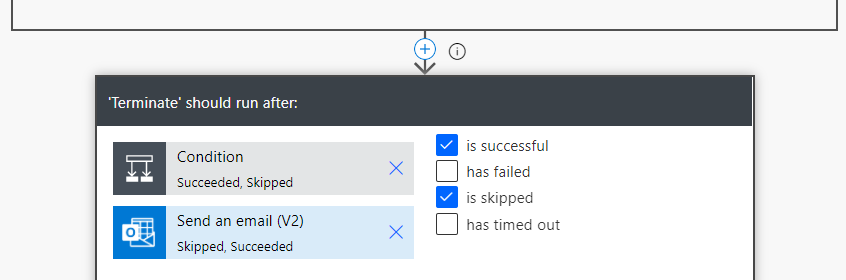
To achieve such result just click first action, select checkboxes and then select second action. It is not indicated visually in the designer but it works.
You can also remove some actions from run after configuration.
You can check who this is working in gif connected to my Tweet about that.
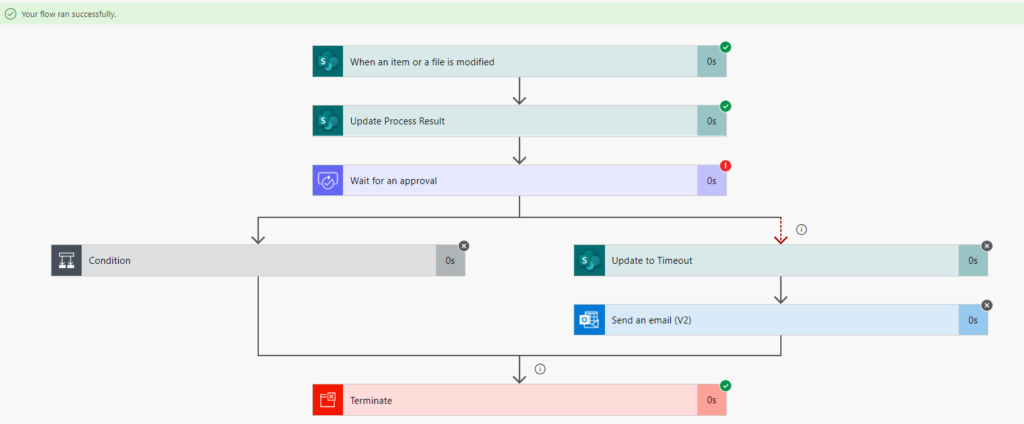
The key point is now my Flows are finishing successfully:
Summary
This is it How to overcome the Power Automate Approvals 30 days limit I hope you enjoyed it and what the most it will be useful for you.
This approach will also work for many Approvers thou in the text above I was not directly mentioning that.
What I really like in this approach is that it does not require premium license and all can be done quick quickly without a lot of extra effort. Speaking about extra effort with some changes it could also scale to not stick to single list but that is something for next post.
Thank you for reading and as always appreciate all comments and feedback.
This is great! Thanks for the guide, it was very helpful!
One issue I’ve come across is when the approval is received from the first workflow, the approver then actions it as soon as it hits their inbox, before the second workflow has kicked off and has landed on the wait for approval stage (similar to the loophole you referred to). As it’s now actioned before it the wait for approval has occurred, the wait for approval wont ever start and errors with “Cannot wait on this approval in its current state”. Have you come across this before and know of a way to cater for this?
Hi Dan,
I had finally time to review comments – apologize for late repply…
I reworked the approach to mitigate such a problem 🙂 hope it will help.
Regards
Dawid